
What an Inspector Checks on a Flat Roof (Zone by Zone)
- Superior Roofing

- Jul 7
- 6 min read

Quick Answer: A complete commercial roof inspection covers 6 zones: field membrane, perimeter and edge metal, penetrations, drainage, vertical flashings, and substrate. The inspector walks the entire surface, photographs each deficiency with zone-level location reference, tests seams and drains, and produces a written report with severity ratings and repair timeframes. A typical 20,000-square-foot roof takes 2 to 4 hours on site.
Property managers often see only the inspection report, not the work behind it. Understanding the inspector checks on a flat roof helps you evaluate report quality, ask better follow-up questions, and identify when an inspection has been cut short. This article walks through the six inspection zones in the order they're typically performed.
At a Glance
Quick Facts:
6 inspection zones: Field membrane, perimeter, penetrations, drainage, flashings, substrate
Time on site: 2 to 4 hours for 20,000 sq ft
Photos taken: 50 to 300, depending on deficiency count
Seam pull-tests: 5 to 15 sample seams on TPO/PVC
Drainage flow tests: Every drain and scupper
Report turnaround: 7 to 14 business days standard
Zone 1: Field Membrane
The field membrane is everything between the perimeter and the penetrations. It's the largest surface area and usually the most homogeneous.
What the inspector checks.
Overall surface condition and weathering pattern
Seam integrity (visual and physical pull-test on TPO/PVC)
Fastener back-out (mechanically attached systems)
Blisters, ridges, fishmouths, and substrate movement
Granule coverage (modified bitumen, BUR)
Walking pad condition and placement
Hail damage indicators (bruising, fracture, surface spalling)
Foot traffic damage from previous service visits
How they document it. Sample seams photographed with date stamp. Each visible deficiency is tagged on a roof plan. Granule coverage rated by percentage where applicable.
Common findings. Seam separation, fastener back-out, hail bruising, and foot-traffic damage near rooftop equipment.
Zone 2: Perimeter and Edge Metal
The perimeter is where the roof meets the wall, parapet, or edge of the building. Edge metal failures cause more wind-uplift damage than any other zone.
What the inspector checks.
Drip edge condition and attachment
Gravel stops on BUR
Coping cap fasteners, joints, and seals
Parapet wall flashings
Counter-flashings at parapet tops
Wind uplift indicators (lifted edges, displaced fasteners)
Sealant condition at all joints
Galvanic corrosion at dissimilar-metal contact points
How they document it. Each side of the perimeter was walked and photographed. Coping cap joints are inspected individually. Wind uplift indicators flagged for immediate attention.
Common findings. Failed coping cap sealants, lifted edge metal, parapet flashing separation, and rusted fasteners.
Zone 3: Penetrations
Every hole through the roof is a potential leak point. Commercial roofs typically have dozens to hundreds.
What the inspector checks.
HVAC unit curb flashings and counter-flashings
Plumbing vent stack flashings and pipe boots
Gas line stanchions and pipe supports
Electrical conduit penetrations
Exhaust fan curbs
Skylight curbs and counter-flashings
Communication antenna mountings
Lightning protection components
Solar mounting penetrations (where applicable)
Sealant condition at every penetration
How they document it. Each penetration was photographed individually. Severity rated. Sealant condition noted. Approximate age estimated where possible.
Common findings. Failed pipe boot rubber, cracked sealant at HVAC curbs, separated counter-flashings, and unsupported gas lines.
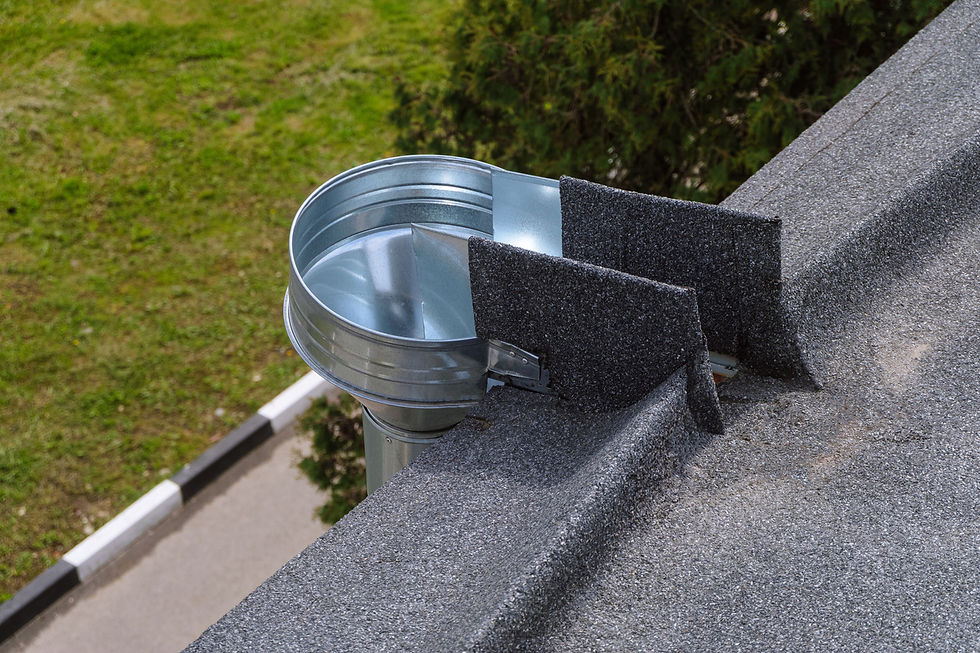
Zone 4: Drainage
Drainage is the number-one finding industry-wide. Every commercial inspection prioritizes this zone.
What the inspector checks.
Roof drain bowls, strainers, and clamping rings
Scupper openings and through-wall fittings
Internal drain piping (where accessible)
Overflow scuppers and emergency drains
Downspout flow at each discharge point
Ponding locations and depth (measured 48+ hours after rainfall)
Slope deficiencies
Granule wash and debris accumulation
Ice damage at scupper locations
How they document it. Each drain is tested with water flow. Ponding mapped with measurements. Photos of debris and damage.
Common findings. Debris-clogged drains, scupper ice damage, ponding longer than 48 hours, and disconnected downspouts.
Zone 5: Vertical Flashings and Transitions
Vertical flashings handle the transition between the horizontal field membrane and vertical surfaces. They fail before the field in most commercial roofs.
What the inspector checks.
Wall-to-roof flashings (cant strips, base flashings)
HVAC curb flashings (separately from Zone 3 penetration check)
Skylight curb flashings
Expansion joint covers
Pipe penetration flashings at vertical surfaces
Equipment support pad flashings
Termination bar attachment
Counter-flashing reglet condition
How they document it. Each vertical transition was photographed. Adhesion was tested where appropriate. Termination bars checked for fastener spacing and condition.
Common findings. Termination bar separation, counter-flashing pull-out, expansion joint cover damage, and cant strip degradation.
Zone 6: Substrate and Deck
The substrate is what's under the membrane. Most substrate problems are invisible from the surface but produce diagnostic clues.
What the inspector checks.
Soft spots indicating wet insulation (foot test or probe)
Blister patterns indicating substrate moisture
Visible deck deflection
Areas of unusual membrane texture (often moisture indication)
Infrared survey results (if performed)
Core sample results (if performed)
Substrate movement evidence (cracks, ridging)
How they document it. Soft spots mapped on the roof plan. Probe results noted. Recommendations for infrared or core sampling if hidden moisture is suspected.
Common findings. Wet insulation in localized areas, substrate movement near building expansion joints, and deck deflection at HVAC equipment.
How the Inspector Documents the Walk
Documentation methods drive report quality. Look for these specific practices.
Zone-mapped photo references. Each photo is tagged to a numbered zone on a roof plan. Without zone mapping, photos can't be located for future reference.
Date and time stamps. All photos timestamped. Confirms when the inspection occurred for warranty and insurance purposes.
Severity ratings. Each deficiency is rated (typically critical/major/minor / observation). Drives repair prioritization.
Timeframe recommendations. Each deficiency is assigned a recommended action timeframe (immediate / 30 days / 6 months / next maintenance cycle).
Cost-range estimates. Repair work is estimated in ranges, not bid prices. Estimates are diagnostic, not contractual.
Inspector credentials documented. Signed report with inspector name, certifications (HAAG, Red Seal), and contact details.
The Inspection Tools Used
Equipment varies by firm and scope.
Standard tools.
Digital camera with date/time stamp capability
Measuring tape and depth gauge
Probe rod for substrate testing
Pull-test kit for TPO/PVC seam testing
Flashlight and headlamp for shaded areas
Tablet or notebook for field notes
Safety equipment (harness, fall protection where required)
Advanced tools (scope-dependent).
Infrared camera for moisture detection
Core drill for sampling
Electronic leak detection equipment
Moisture meter for non-destructive testing
Most Calgary commercial roofing firms use the standard kit on every inspection and bring advanced tools when the scope requires.

What a Weak Inspection Looks Like
A complete inspection includes everything an inspector checks on a flat roof, from the membrane and flashings to penetrations and drainage. If these areas aren't documented, the inspection may be incomplete.
No photos or photos without zone references
No severity ratings or timeframe recommendations
Narrative-only report without deficiency tables
No drainage flow testing was documented
No penetration count or individual penetration documentation
On-site time clearly inadequate for roof size (under 1 hour for 20,000 sq ft)
No written report or report only available as a verbal walkthrough
A weak inspection exposes the building owner to documentation gaps that hurt insurance claims and warranty disputes years later. Pay for a complete inspection or don't pay for one at all.
Frequently Asked Questions
How do I know the inspector actually walked the whole roof?
Photo timestamps and zone coverage show the route taken. Ask to see all photos, not just deficiency photos. A complete inspection produces overview shots of every zone plus deficiency closeups.
Why does the inspector test drains with water?
Visual inspection doesn't confirm flow. Drains can look clear but be partially blocked downstream. Water testing confirms actual flow rate and identifies blockages that aren't visible from the surface.
What's a seam pull-test, and is it destructive?
A seam pull-test applies controlled force to a TPO or PVC seam to verify weld strength. It's non-destructive when performed correctly. Failed pull-tests indicate weld defects that warrant repair.
Will the inspector identify problems with my HVAC equipment?
The inspector documents how HVAC units interact with the roof (curb condition, sealant, support) but doesn't inspect the units themselves. Mechanical inspection is a separate trade.
Should the inspection happen on a specific day or under specific weather conditions?
Dry conditions are required for safety and for accurate assessment. Inspections should not happen during rain, snow, or shortly after rainfall (ponding measurements need 48 hours after rainfall ends). Optimal conditions: dry, calm, mid-day with full daylight.

About Superior Roofing: Superior Roofing Ltd. provides Calgary commercial roof inspection throughout the city, specializing in 6-zone documented inspections, full photo and zone mapping, and HAAG Certified scope reports delivered by Red Seal Journeymen for property managers requiring trusted, complete commercial roof inspection.
Ready to schedule a complete 6-zone Calgary commercial roof inspection? Superior Roofing helps property managers get full documentation that supports warranty, insurance, and capital planning backed by 25+ years of local experience.
Contact us today at 403-464-3812 to book your free Calgary commercial roof inspection quote.
Disclaimer: Roofing involves safety risks; consult licensed professionals for work beyond ground-level visual checks. Costs and specifications provided are estimates based on typical Calgary market conditions and may vary based on specific project requirements and current material pricing.


L'inspection régulière de la toiture plate est cruciale pour prévenir les infiltrations d'eau coûteuses sur le long terme. Il est tout aussi important pour les professionnels du bâtiment de savoir présenter leurs services de manière organisée. Vous pouvez utiliser Biovelt pour regrouper vos portfolios de rénovation et vos coordonnées de contact en un seul endroit accessible. Cela facilite grandement la gestion de votre présence numérique auprès de vos clients potentiels.