
How to Find the Source of a Roof Leak
- Superior Roofing

- May 23
- 7 min read
Updated: 4 days ago

Quick Answer: Roof leaks rarely enter directly above where you see the drip. Water travels along rafters, decking, and ceiling joists before becoming visible. To find the source: inspect the attic with a flashlight during daylight (look for stains running upward), inspect the exterior from ground level with binoculars (focus on flashing, vent boots, and shingles), and use a two-person hose test to systematically wet roof sections while watching for indoor drips. Hard-to-find leaks often require roof repair services from a thermal-camera leak detection specialist.
The frustrating reality of roof leaks: the wet stain on your ceiling is rarely directly below where water enters the roof. Water finds the path of least resistance, running along rafters and joists for several feet before becoming visible. Calgary homeowners who try to diagnose by looking only at the area above the drip often miss the actual source by 5 to 15 feet. This article walks through the systematic 4-step method to trace a leak from interior symptom to roof source, the most common Calgary leak locations to check first, and when to give up and call a leak detection specialist.
At a Glance
Quick Facts:
Most common leak source in Calgary: Flashing failure (60% to 70% of leaks)
Distance water can travel: Often 5 to 15 feet from entry to interior visibility
Best time to inspect attic: Sunny daylight (sunlight through cracks reveals openings)
Two-person hose test: Most reliable homeowner diagnostic method
Thermal camera detection: Available from leak detection specialists for hidden leaks
Typical leak detection service cost: $200 to $500 for professional diagnosis
Why Water Travels: Rafter Wicking and Joist Runs
A roof leak entering at one point doesn't drip straight down. Water:
Wicks along rafters. Capillary action draws water along the wood grain of rafters. A leak entering the deck near a chimney can travel 4 to 8 feet along a rafter before dropping.
Runs along the underside of the decking. Water gathered on the underside of OSB or plywood decking flows along the surface, often following the slope of the deck for several feet before falling.
Travels along ceiling joists. Once water reaches the ceiling, it can run along the top of drywall or insulation for additional distance before showing as a stain.
Pools at low points. The visible drip location is often the lowest point along the water's travel path, not the entry point.
The practical implication: Looking at the area directly above your drip rarely shows you the leak source. You have to trace the water back to its origin.
Step 1: Indoor Signs (Where to Start)
Before going outside or into the attic, document what you can see indoors.
Active drip locations. Note exactly where water is dripping. Take photos with a wide enough frame to show context.
Ceiling stains. Trace the boundaries of any wet or stained areas. Stains often spread outward from the original leak point as water saturates drywall.
Wall stains near the ceiling. Water sometimes runs down the wall above where it enters the ceiling. Look for staining at the wall-ceiling junction.
Bubbling paint or peeling drywall. Trapped moisture is pushing the surface away. Indicates active or recent water exposure.
Mould or musty smell. Long-term leak signs. The leak has been active for weeks or months.
Specific weather correlation. Note what weather causes the leak: heavy rain, wind-driven rain from a specific direction, snowmelt, ice damming, or only at thaw. Each pattern points to different leak sources.
Step 2: Attic Inspection
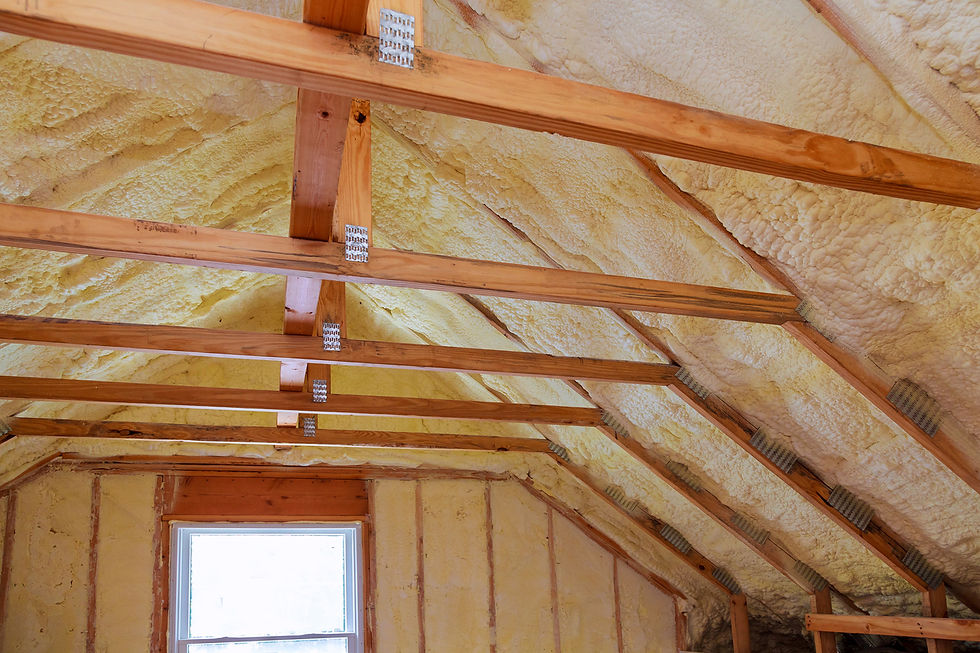
The attic is where most leaks reveal themselves. Schedule an attic inspection during sunny daylight hours.
Bring a flashlight (LED, bright).
Look for these signs:
Sunlight through the deck. If you can see daylight in any spot, water can enter there. Mark the location.
Water stains on rafters. Dark patches running along the wood grain. Trace these upward to find where water entered.
Water stains on the underside of the decking. Often appears as dark patches or rings on the OSB or plywood.
Active drips or wet wood. During or shortly after rain, follow active water trails.
Rust on nails. Rusted nail heads protruding through the deck indicate sustained moisture in that area.
Mould growth. Black, green, or white patches on rafters or sheathing. Indicates long-term moisture.
Wet insulation. Compressed, dark, or sagging insulation marks moisture zones.
Trace upward. Water travels downward, so the leak source is always above and uphill from the visible damage. Follow the wettest path uphill (toward the ridge) until you find the highest stain or the entry point.
Mark suspected the source. Use chalk or tape to mark the suspected entry zone on the underside of the decking.
If your attic doesn't have safe walking surfaces (no plywood floor, only joists with insulation between), don't risk falling through the ceiling. Call a contractor for inspection in homes with restrictive attic access.
Step 3: Outdoor Visual Inspection
Move outside. Stay on the ground; use binoculars for detail.
Inspect specifically:
Flashing at chimneys. Visible cracks, lifted edges, dried caulk, and masonry settling.
Skylight perimeter. Lifted shingles, visible flashing damage, and deteriorated seals.
Sidewall transitions. Where the roof meets a vertical wall (often above garages or at second-storey junctions).
Vent stacks and pipe boots. Cracked rubber is visible on the boot, dislodged flange, and damaged shingles around the boot.
Valleys. Damage in the valley channel, debris dams, and lifted shingles at valley edges.
Ridge caps. Missing or damaged ridge cap shingles.
Eaves and edge. Ice dam evidence, fascia damage, gutter issues.
Damaged shingles. Missing shingles, lifted tabs, cracked or curled shingles, and granule loss patterns.
Cross-reference with attic findings. The exterior visible damage should align with the attic-marked entry zone. If the attic suggests the leak is near the chimney and you see lifted flashing on the chimney from outside, you've found your source.
Take photos. Document everything for your contractor and insurance.
Step 4: Hose Test (Two-Person Method)
If indoor and outdoor inspection don't conclusively identify the source, the hose test is the best homeowner-accessible diagnostic.
Setup:
Two people: one inside near the suspected leak, one outside operating the hose.
Garden hose with adjustable spray nozzle.
Phones for communication during the test.
Patience: each section needs 5 to 10 minutes to show results.
Procedure:
The outside person starts at the eaves on the side closest to the suspected leak. Spray water against the eave and lower section of shingles. The inside person watches for any new water entry.
After 10 minutes, move uphill. Spray the next section.
Continue moving up the slope until you reach the ridge.
If no leak appears, repeat on each penetration: chimney, skylights, sidewalls, vent stacks, valleys.
When the inside person sees water entering, you've found the leak source.
Why this works: The hose simulates rain. By controlling which section gets wet, you can isolate the entry point.
Cautions:
Don't pressure-spray. The goal is to simulate rain, not damage shingles.
Don't run the hose for hours at once. 5 to 10 minutes per section is enough.
Stop if you find the leak; don't keep wetting the rest of the roof.
The hose test is messy but effective. Most Calgary homeowners can identify their leak source with this method when indoor and outdoor inspection has narrowed the possibilities before moving forward with roof repair.
When to Call a Leak Detection Specialist
If, after all four steps, you can't find the source, the leak is hidden. Common reasons:
Multiple entry points. Two or three small leaks combine to look like one larger leak. Each individual leak is too small to find with visual inspection.
Capillary travel exceeds inspection range. Some leaks travel 20+ feet from entry to interior visibility, especially on complex roofs with multiple slopes.
Hidden penetrations. Old skylights that were sealed over, capped chimneys, and removed satellite mounts. The roof above looks normal, but the underlying penetration was never properly sealed.
Subsurface damage. Deck rot, undeflashed sidewall, or compromised valley underlayment that doesn't show externally.
For these cases, a leak detection specialist using thermal imaging cameras, moisture meters, and sometimes electronic leak detection equipment finds what visual inspection misses. Superior Roofing offers a paid leak detection service for these difficult cases.
Cost: $200 to $500, typical for a professional diagnosis. Worth it when a DIY inspection has failed and water damage is ongoing.

Common Calgary-Specific Leak Sources
A few sources show up disproportionately in Calgary because of the climate.
Ice damming at eaves. Calgary classic. Visible after winter; often discovered as the spring thaw reveals interior staining.
Chimney flashing failure. Calgary masonry chimneys settle over decades; the seal cracks regardless of shingle condition, often requiring flashing repair.
UV-degraded vent boots. High-altitude UV plus freeze-thaw shortens boot life to 8 to 12 years.
Wind-lifted shingles. Calgary's Chinook winds regularly produce gusts capable of lifting shingles, especially on south and west-facing slopes, often resulting in residential roof repair.
Hail-damaged areas. After major hail events, even apparent minor damage can leak weeks or months later as compromised shingles fail.
When in doubt about which Calgary-specific cause your leak might match, the symptom-and-weather correlation in Step 1 is the most useful clue.
Frequently Asked Questions
Why do leaks only appear during heavy rain?
Some leaks need volume to manifest. A small flashing crack might handle moderate rain by allowing water to drain off externally; heavy rain overwhelms the drainage and forces water into the home. Wind direction also matters; some leaks only appear when rain is driven from a specific direction.
Why is the stain growing each storm?
Either the leak is worsening (the entry point is enlarging) or water is finding new paths inside the structure. Both indicate the leak should be addressed before the next storm.
Can a thermal camera find a leak?
Yes, in many cases. Thermal cameras detect temperature differences, and wet building materials are typically cooler than dry ones. A trained technician using thermal imaging can identify moisture patterns invisible to the naked eye. Especially useful for hidden subsurface leaks.
What if I find the leak but can't reach it safely?
Call a contractor with the documented location. Knowing the source ahead of time speeds up the repair quote and reduces diagnostic time. Don't risk a fall trying to reach it yourself; the time savings don't justify the injury risk.
Should I call my insurance before or after I find the source?
If interior damage is significant, call insurance regardless of source identification. Insurance carriers don't require you to identify the source before filing; they send an adjuster (or accept your contractor's scope) to determine cause. Document the damage and call within 24 hours.

About Superior Roofing: Superior Roofing Ltd. provides Calgary residential roof repair throughout the city, specializing in advanced leak detection using thermal imaging and HAAG-certified diagnostic methods delivered by Red Seal Journeymen for homeowners requiring trusted, accurate leak diagnosis.
Ready to find the source of a Calgary roof leak you can't trace yourself? Superior Roofing helps Calgary homeowners get professional leak detection backed by 25+ years of local experience, thermal imaging tools, and 24/7 emergency response when interior damage is active.
Contact us today at 403-464-3812 to book your free residential roof repair quote.
Disclaimer: Roofing involves safety risks; consult licensed professionals for work beyond ground-level visual checks. Costs and specifications provided are estimates based on typical Calgary market conditions and may vary based on specific project requirements and current material pricing.


Comments